


How to Do IT Band Stretches Safely
A sore spot on the outside of your knee can make a run or a flight of stairs feel different. IT band stretches are one option to try, but the right movement depends on what’s causing the pain. We’ll walk through wall and floor versions, then cover gentle pacing and when to seek advice.
Table of Contents
Step 1: Check Your Symptoms and Get Set Up
The iliotibial band, or IT band, is a strip of firm connective tissue running along the outer thigh, from the hip to just below the knee. It helps support the knee as your leg moves. Pain around the outer knee or hip can have different causes, so don’t assume the band is the source. Repeated activities such as running, walking or cycling can be linked with symptoms, and other hip or knee conditions can feel similar.
Notice when discomfort starts and what seems to bring it on. Does it happen during a run, while cycling or when you walk downstairs? These details can help a health professional assess the problem. If pain is sharp, getting worse or affecting everyday movement, pause the stretch and seek advice rather than trying to diagnose yourself.
To get set up, choose a clear space and wear clothes that let your hips and legs move freely. A wall is useful for standing variations. A mat or carpet can make floor-based moves more comfortable. Begin with a few minutes of easy walking so you’re not moving straight from sitting into a held stretch.
Unleashed Health Chiropractic is based in Ascot Vale and sees people from nearby Melbourne suburbs. An initial appointment includes a medical history and physical examination. That can help assess whether a stretch or rehabilitation exercise suits your symptoms. If you’re also working on the front of your hip, our steps for hip flexor stretches cover a separate area and movement.
Pause and get medical advice:Seek prompt care for severe or sudden pain, marked swelling, a locked knee or a knee that gives way. A clinician can check for causes that need a different approach.
Step 2: Try a Standing IT Band Stretch by a Wall
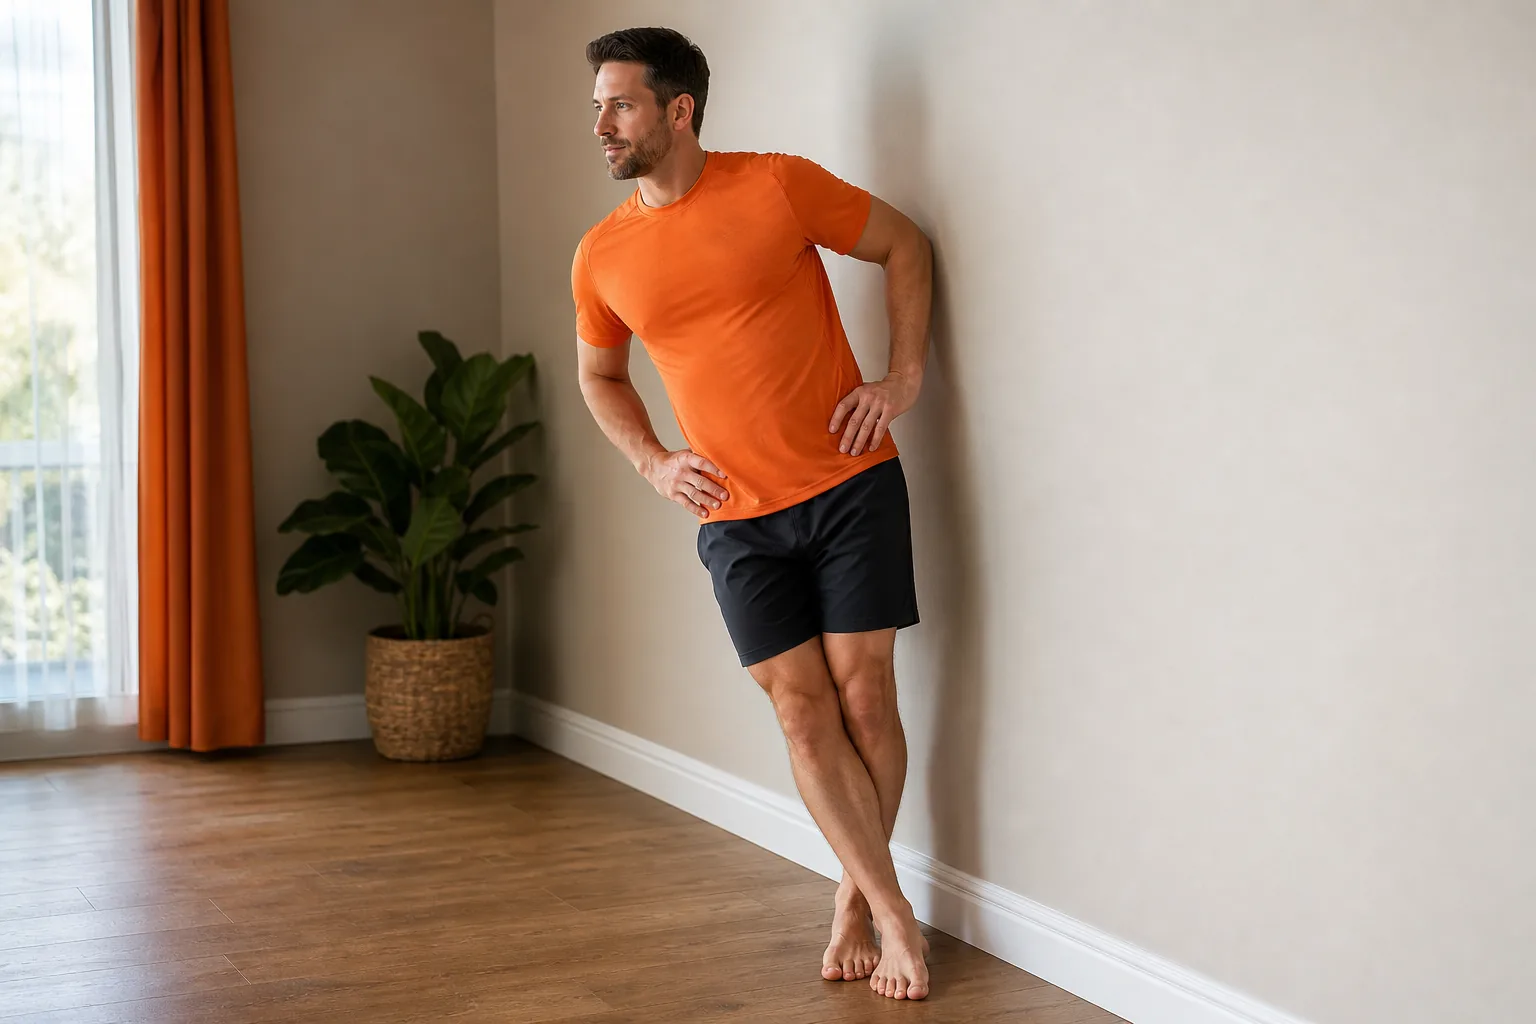
This wall-based version uses your body position to create a gentle pull along the side of the hip and thigh. Keep the movement small at first. You should feel a mild stretch, not a sharp pinch or rising pain.
Stand about a foot from a wall, with the side you want to stretch closest to it.
Place your other leg in front of that leg.
Keep the knee of the side closest to the wall straight, without forcing it back.
Lean your trunk away from the wall. Let the hip on the stretching side move towards it.
Keep your chest facing forward. Don’t fold or lean forward from your waist.
Ease out slowly.
Check your form before each hold. A common slip is leaning forward at the waist instead of moving the trunk sideways. Another is bending the knee, which can change the position of the stretch. Keep both feet on the floor and use the wall lightly for balance, rather than pushing hard into it.
If the wall makes you feel unsteady, step closer and use a smaller lean. If you can’t keep the knee straight without discomfort, stop and try a different position after getting advice. A stretch should not leave you with more pain once you stand upright.
The standing option needs little space and no floor transfer. It may fit a short movement break at home, but it shouldn’t be used to push through pain during a run. Our notes on running-related knee discomfort explain why a change in activity can matter alongside stretching.
Step 3: Explore a Floor-Based Stretch Variation
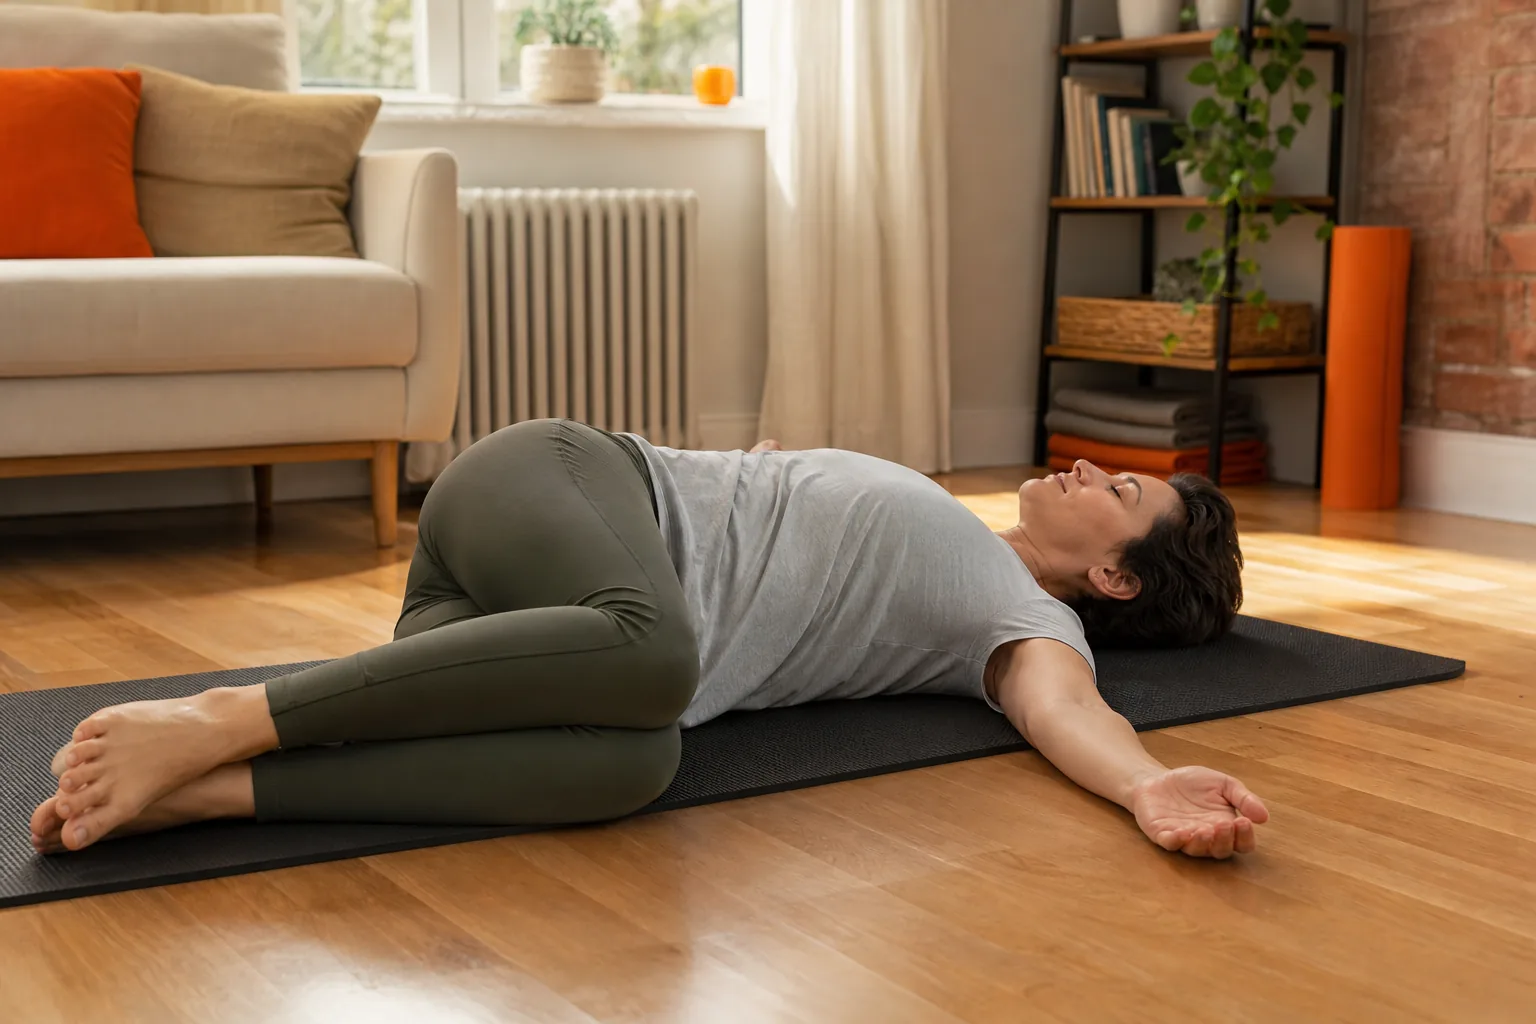
A floor-based option may feel easier to control because your back is supported. Try the supine crossover first. “Supine” means lying on your back. Keep the range small enough that your shoulders stay settled on the floor.
Supine crossover stretch
Lie on your back on a mat, with both legs extended.
Raise one leg towards the ceiling, keeping the knee as straight as feels comfortable.
Slowly guide that leg across your body towards the other side.
Keep both shoulders resting on the mat. Stop when you feel a mild pull across the outer hip or thigh.
Hold for about 30 seconds, then return the leg to the centre with control.
Don’t force the leg down or twist your whole back to gain more range. If the shoulder on the lifted-leg side comes off the floor, bring the leg back towards the centre. You can use a strap or towel around the thigh to guide the leg, but don’t pull hard. If a strap makes you strain, leave it aside.
Side-lying option
If lying on your back is uncomfortable, a side-lying variation may be easier to set up. Lie on your side with the bottom leg straight. Bend the top knee, hold the ankle if you can do so comfortably, then let the knee lower gently behind you. Keep your hips stacked rather than rolling backwards. Stop if the position strains your knee or hip.
Another floor option is the all-fours stretch, but it asks for a longer hold than the usual 30-second example. If the outer knee feels strained, bring the front heel closer to your body or choose another movement. You don’t need to chase a deeper stretch. Adjust the position until the sensation stays mild.
Unleashed Health Chiropractic offers rehabilitation exercises as part of its chiropractic services. A tailored assessment can help decide whether a floor stretch suits your movement and symptoms. If you’re working on general hip mobility too, our gentle hip stretch options cover other positions.
Step 4: Build a Gentle Routine and Adjust It
Start with a short warm-up, such as easy walking, before holding a stretch. One health service’s exercise instructions suggest warming up for five to ten minutes and moving slowly. A dynamic warm-up uses easy movement rather than staying in one held position. For a walk or run, begin at a comfortable pace before increasing effort.
For a simple starting routine, choose one standing stretch or one floor version. Try a hold of around 30 seconds, then see how your leg feels as you move normally. A care plan may use two or three repetitions, but instructions vary by stretch and person. The wall stretch described above has its own repetition schedule, so don’t assume every option follows the same pattern.
Static stretching means holding a position. Active movement means moving in and out of a range without a long hold. Neither needs to feel forceful. If a held stretch irritates your symptoms, reduce the range or skip it. If gentle movement feels more comfortable, use that instead and ask a clinician what fits your situation.
A clinician may consider exercises such as clamshells or standing hip abduction, where you move a leg out to the side. These are strength exercises, not stretches, and the right choice depends on assessment.
Foam rolling is another technique people ask about. Rolling over the side of the thigh may feel uncomfortable, so use light pressure and avoid pressing directly on a sore knee. It shouldn’t be treated as a way to force the IT band to lengthen. A physiotherapist or other relevant clinician can help decide whether rolling belongs in your plan.
If you run or cycle, note when discomfort appears and how it changes with activity. Avoid using a stretch as permission to keep going through worsening pain. A physiotherapist can assess movement and help plan a gradual return to training when appropriate. Unleashed Health Chiropractic takes a history and assesses movement before tailoring care; an assessment can help you discuss whether stretching or rehabilitation is suitable.
Pro Tip:Keep a simple note of the stretch, hold time and how your leg feels afterwards. Change one thing at a time, such as range or repetitions, so you can spot what aggravates symptoms.
Stop if you feel sharp pain or pain that increases during a movement. A mild pulling sensation can happen during a stretch, but it should settle when you ease out. If symptoms keep returning, affect daily tasks or don’t improve, arrange an assessment with a suitable health professional.
Frequently Asked Questions
How long should I hold an IT band stretch?
A common instruction is to hold a stretch for about 30 seconds, but the time depends on the movement and your care plan. Some guidance gives a range of 30 seconds to one minute. Start gently and follow any advice from your health professional. A longer hold isn’t automatically better, especially if it brings on pain.
Should an IT band stretch hurt?
No, a stretch shouldn’t cause sharp or increasing pain. A mild pulling feeling may be comfortable for some people, but stop if pain rises or the movement feels wrong. Ease out slowly, then try a smaller range only if symptoms settle. If pain persists or affects daily movement, seek advice rather than repeating the stretch.
Can I stretch before running?
You can warm up with easy movement before stretching, but don’t rely on a stretch to make painful running safe. Start with a few minutes of comfortable walking, then check how your leg responds. If discomfort builds as you run, reduce or stop the activity and seek guidance if it continues. A clinician can help plan an appropriate return.
Does foam rolling stretch the IT band?
Foam rolling applies pressure to the soft tissue around the outer thigh, but it shouldn’t be treated as a way to lengthen the IT band. Use light pressure and stop if it causes sharp pain or worsens symptoms. If you’re unsure whether rolling suits your symptoms, ask a physiotherapist or another relevant health professional.
Conclusion
Choose one gentle position, keep the movement comfortable and stop if pain sharpens or increases. If symptoms linger or limit walking, running or cycling, arrange an assessment with a suitable health professional. Unleashed Health Chiropractic in Ascot Vale can assess your history and movement, then discuss whether a stretch or rehabilitation exercise is appropriate for you.


Comments